Rigid vs. Flexible PCBs: Which One is
Best for Your Next Project?
Learn about rigid PCBs vs. flexible PCBs, when it's better to use one type instead of the other, and learn about some manufacturing steps related to each of these PCB types.
A Printed Circuit Board Is Not Always a “Board”
When the term “PCB” is used, many people think of a rigid PCB (printed circuit board). However, the term PCB can refer to either a rigid PCB or a flexible PCB. Flexible PCBs are more commonly known as flex circuits, but they are also known by other names including flex boards, flexible circuit boards, flexible printed circuit boards and, more officially, flexible electronics. Flex circuits have recently gained huge popularity due to the fact that they can be shaped, bent, twisted, and folded into limitless configurations. In the end, however, rigid PCBs and flexible PCBs serve, in the most basic sense, the same ultimate function, which is connecting various electrical and mechanical components together.
When to Use Rigid and When to Use Flexible
Rigid PCBs typically cost less than flex circuits. I say “typically” because when considering the total cost of ownership there are some applications that, when using flexible PCBs, may be less expensive compared to using rigid PCBs. To get a true and accurate understanding of the total cost of ownership, you first need to appreciate the fact that flex circuits may eliminate the need for components such as connectors, wire harnesses, and other circuit boards. By removing these components from a design, material cost, labor and assembly cost, and scrap cost are all reduced.
Many electronic devices (laptop and desktop computers, audio keyboards, solid-state drives (SSDs), flat-screen TVs and monitors, children’s toys, and various electronic gadgets) employ rigid PCBs instead of flexible PCBs. However, flex circuits may be found in ultra-compact and/or high-performance devices, including GPS units, tablets, smart phones, cameras, and wearables.
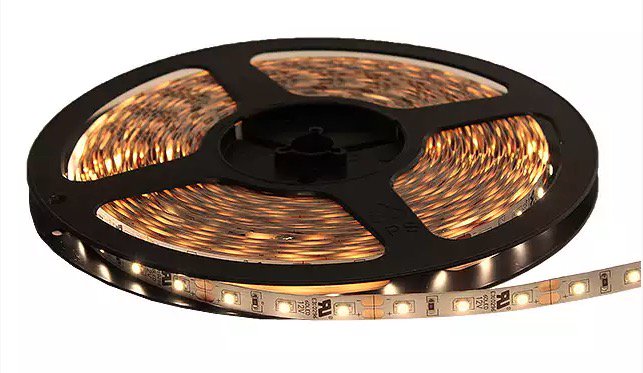
Greater sophistication is not the only reason to use flex circuits; low-tech applications (such as under-the-counter LED lights, see figure below) may utilize flex circuit technology, in some cases because it makes installation much easier.

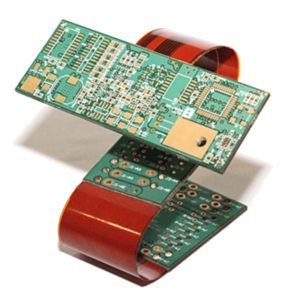
Finally, a flex circuit and a rigid circuit can be used together—as a unified PCB—if the need arises. This approach, perhaps, provides the best of both worlds. See Figure 2 below.

Some Similarities and Differences Between Rigid PCBs and Flex Circuits
When designing rigid PCBs, certain design rules must be followed, including minimum hole sizes, minimum space and trace width, minimum distances to board edges, and copper and overall design thicknesses. Additionally, many manufacturing process steps are shared between rigid and flexible PCBs. Such process steps include the drilling and plating of holes and vias, photo imaging and development, the etching of copper traces, pads, outlines, and planes, and the heating (baking) of the circuit boards for the purpose of removing moisture from the PCBs. At this point in the manufacturing process, rigid PCBs head to the solder mask station while flex circuits go to the coverlay station.
Flex Circuit Overlay
Flex circuit overlay, or coverlay, as it’s also known, is a lamination process used for encapsulating and protecting the external circuitry of a flex circuit. A flex circuit’s coverlay film is similar to a rigid PCB’s solder mask, with one big difference…the coverlay film is flexible! “The coverlay film is generally a polyimide film that is coated with a thermoset adhesive. Film thicknesses range from .0005” to .005” with .001” and .002” the most common.”

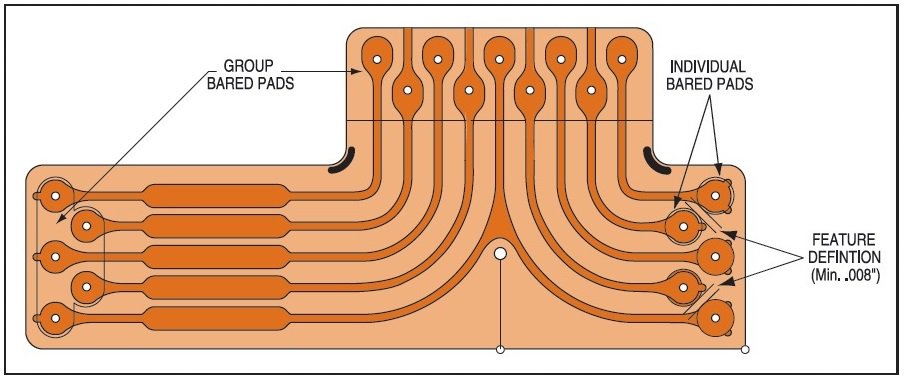
The polyimide and adhesive coverlay is laminated using pressure and heat, WHERE the heat helps the adhesive to easily flow and fill in any gaps between traces and pads; this prevents the trapping of air between the layers. Again from allflexinc.com: “The adhesive flowing is necessary as it helps assure complete surface contact and encapsulation. The adhesive will tend to ooze out slightly around the openings shown in the diagram below. This oozing is commonly referred to as ‘adhesive squeeze out’ and is actually a desired phenomenon.

Once the coverlay lamination process is finished, any component and/or feature openings are made using drilling, routing, or laser cutting. Etching cannot be used.
Capabilities
Payment Methods
Specials Price
Carriers
Support Hobbyist
Certificate
Customer Support
Follow Us
Tel: 1-905-339-2881
Email: [email protected] , [email protected]
Copyright Gold Phoenix PCB Co., Ltd. 2011 - 2023
Tel: 1-905-339-2881 Email: [email protected] , [email protected]
Quality Control System
|
Products/Service
|
Friendly Links
Copyright Gold Phoenix PCB Co., Ltd. 2011 - 2023


